How to Light Your Pathways Like a Pro

Pathway lights are an important safety feature. They illuminate the way through your outdoor space and can create a sense of beauty and charm. While this is often one of the first types of outdoor lighting a homeowner installs, there are many common mistakes that can make them look less-than-perfect. These simple tips will help you create a welcoming and well-lit path that offers the perfect combination of safety and style.
Common Types of Pathway Lights
First, it’s important to understand the different types of landscape lighting typically used for pathways. Once you’re clear on your options, you’ll be able to choose the fixtures that will best suit your space.
Flush Lights
These lights are installed flush with the ground or mounted low on a garden wall. They can help highlight a pathway without distracting from other landscape features or blinding you and your guests. Some feature built-in “eyelids,” which help reduce glare and direct the light in a specific direction.
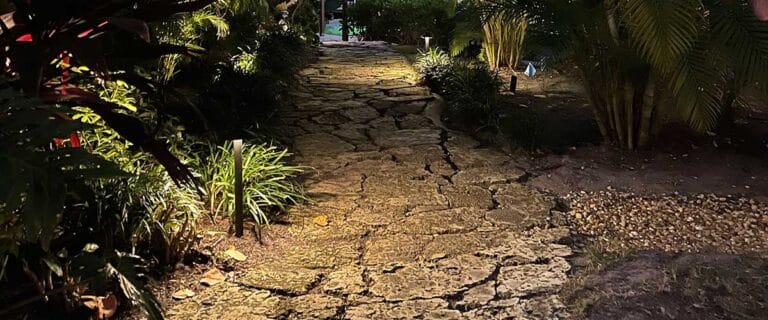
Downlights
Downlights are one of the most versatile path lighting options. They’re installed up high, on a pole, a nearby tree, or a wall. They can create the illusion of a moonbeam, providing gentle illumination as they direct light towards the ground.
Garden Lights
Commonly used in DIY lighting jobs, garden lights come in a variety of styles and are found in most big box stores. They typically stand around 18 to 24 inches high and create a canopy of light that reflects downwards onto the path.
Bollard Lights
Also called pillar lights, bollard lights spread light in 360 degrees and provide more overall light than other types of pathway lighting. They’re often used to indicate the beginning or end of a path or draw attention to intersections.
Pathway Lighting Design Tips
If you want to light up your pathway like a pro, it’s important to watch out for some common mistakes. As you plan out your lighting design, be sure to follow these important tips.
1. Avoid the Runway Look
You may think it’s a great idea to add lots of lights and evenly space them along your path. But if you do, it will end up looking like an airport landing strip. Instead, make sure you space your lights at least six to eight feet apart. This will make your lighting feel more creative and will light your pathways effectively without giving you that dreaded runway look.
2. Use Your Lighting as a Guide
Your path lights should gently guide guests down the path. As you plan your placement, think of each light in terms of the value it adds to your landscaping. If you can add fixtures in a way that brings attention to unique features like flowers, a bush, or garden elements, you’ll add even more interest to your design.
3. Mix and Match Your Features
Instead of placing lines of identical fixtures along your path, try getting creative! Mixing and matching different types of lights can help you further highlight your landscape features and allow you to create a more natural look without feeling forced.
4. Pay Attention to Placement
Place your garden lights, bollards, and downlights slightly away from the path. This will provide illumination while also showcasing the other elements of your landscaping. Also, help avoid blinding and keep glare to a minimum by directing light across the ground and away from the eye.
Need Help with Your Landscape Lighting Plan? Contact Pleasant Lightscapes!
Creating a beautiful landscape lighting plan is more complicated than you may think. The experts at Pleasant Lightscapes can help you develop an eye-catching display that perfectly suits your home. Contact us today to schedule a free consultation and demonstration.